How to Monitor Website Changes?
By The Visualping Team
Updated February 17, 2026
How to Monitor Website Changes: 3 Simple Steps to Stay Ahead
We've all been there. You’re sitting at your desk, thumb repeatedly clicking the refresh button, waiting for those concert tickets to drop or checking if those pair of shoes you've been eyeing have finally restocked.
It’s a massive time sink. Whether you're trying to monitor a webpage for changes to snag a restocked item or you're needing to track pricing changes on a competitor's website, checking these webpages manually is frankly not feasible.
The good news? There's a much, much easier way to monitor these pages.
Website change detection tools have gone mainstream, and millions of people and businesses now use services like Visualping to automate the grunt work.
Why People Track Website Changes
It's not just about shopping. While checking vacancies on career pages is a classic or getting alerted of price drops are classic use cases for website monitoring, the stakes are often higher in a professional setting.
Businesses use these website change detection tools like Visualping for:
- Competitive Intelligence: To keep tabs on your competition and their pricing shifts.
- Compliance: To monitor changes in law or regulatory filings.
- Software Updates: Being the first to know when a patch or new version is live.
How to Track Website Changes with Visualping
Here's a quick, step-by-step guide on how to get notified when a website changes using Visualping.
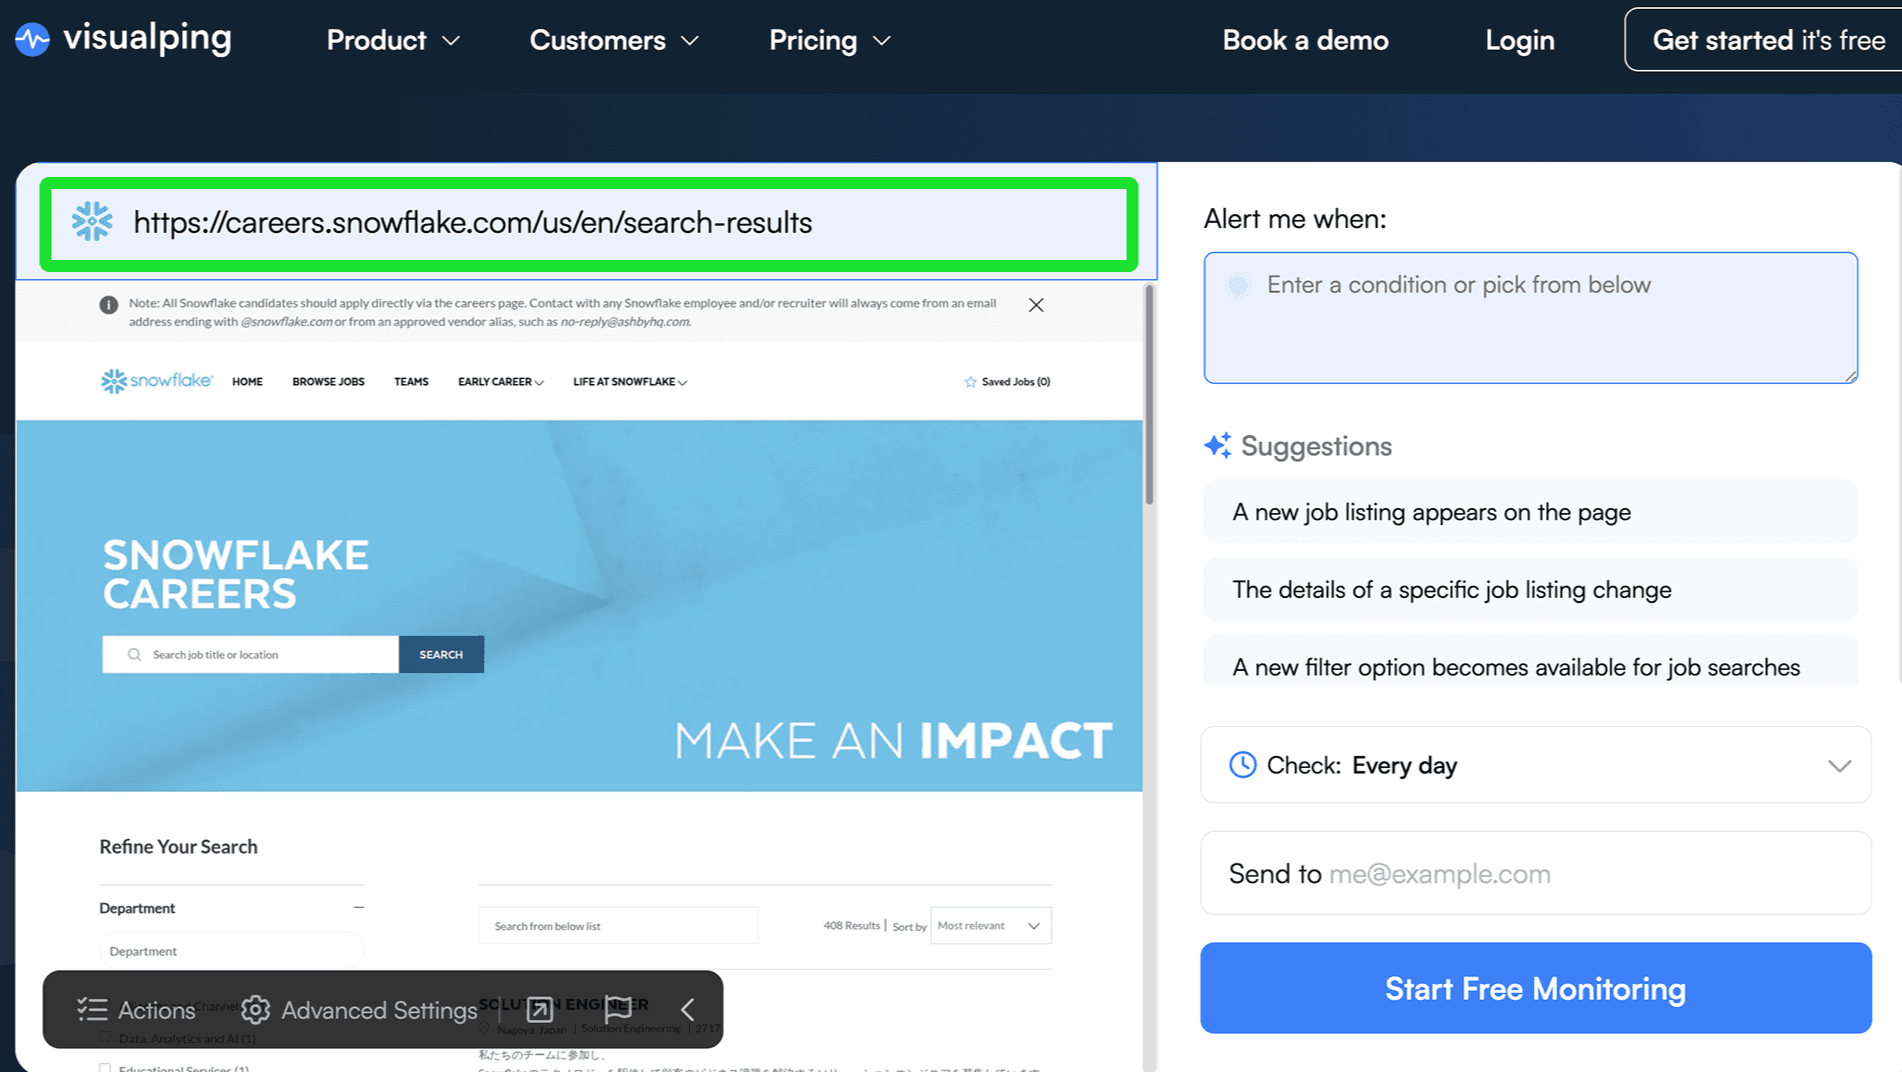
Step 1: Type the URL of the page you want to track
First things first, you need to copy the URL of the page you want to monitor and paste it into the search bar on the Visualping homepage. Hit "Go" and a preview of the webpage should load.
Step 2: Set a criteria for the alert
Next, you can set a condition for your alert, so you're not being notified of every change on the page. In the "Alert me when" box, write out a specific condition for the alert. For example, you can write something like "Alert me when the price drops below $50" or "Alert me when a new marketing job is posted."
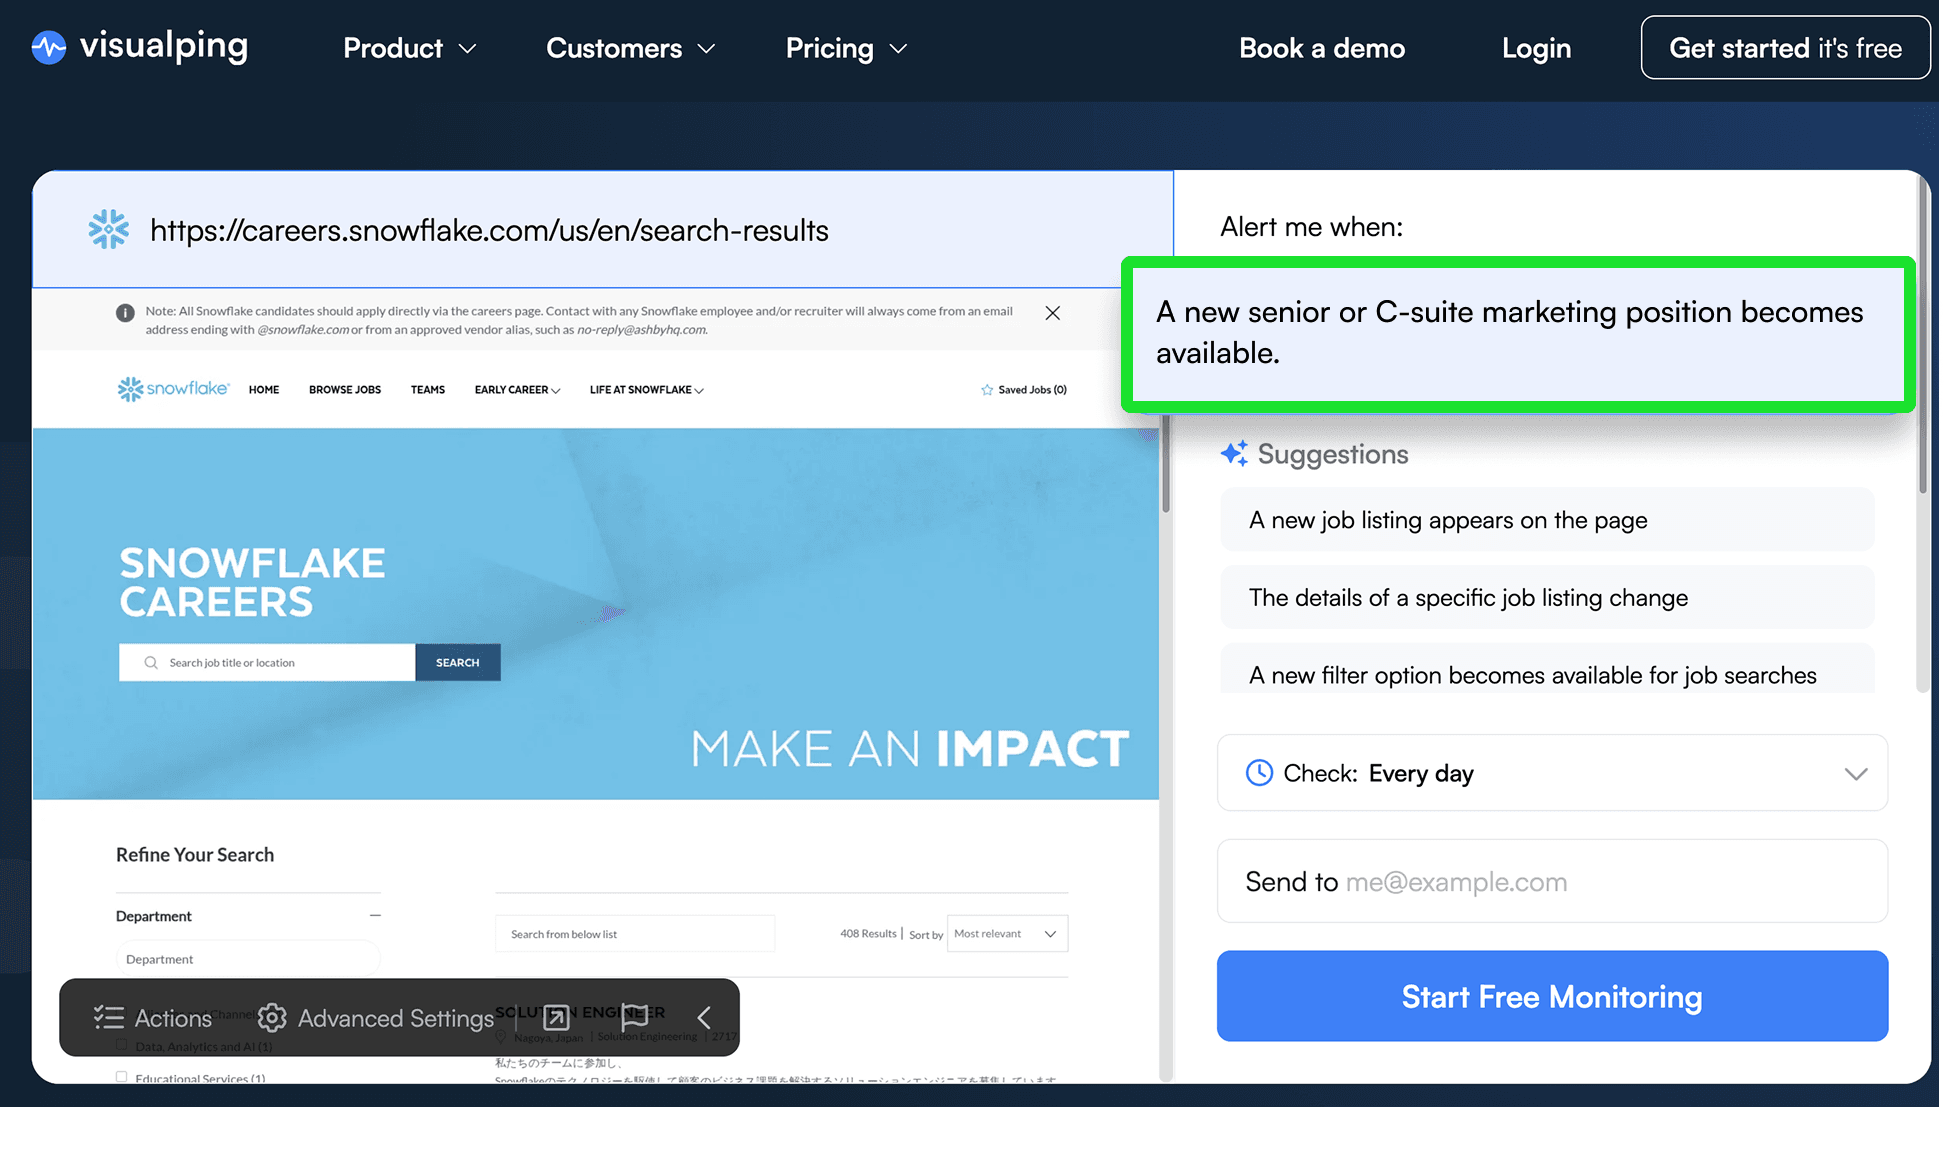
If you want to monitor a specific part of the page, you can also select any part of the page to monitor by dragging a box over the preview. Only the area selected will be the one monitored and the system will ignore any changes outside this selection. If you want to monitor the whole page, you can select "Full page."
Step 3: Set the check frequency and enter an email
Now, you can set how often you want Visualping to check that page, whether that's every day, every hour, every week or another frequency. Free plans can check as frequently as every hour, and paid plans can go as low as every 2 minutes.
Next, just enter your email address to receive your alerts. If you’re new, the system will set up an account for you. You'll get a verification link: click it, set a password, and you're in.
The Visualping Dashboard
When you log in to your Visualping account, you’ll see a list of everything you're tracking. This is where you can fine-tune things.
If you're getting too many emails because of shifting ads, you can adjust your alert condition or page selection area here. You can also change your check frequency for each specific job.
Here's an example of a dashboard with various Visualping jobs set up to track tech policy updates.
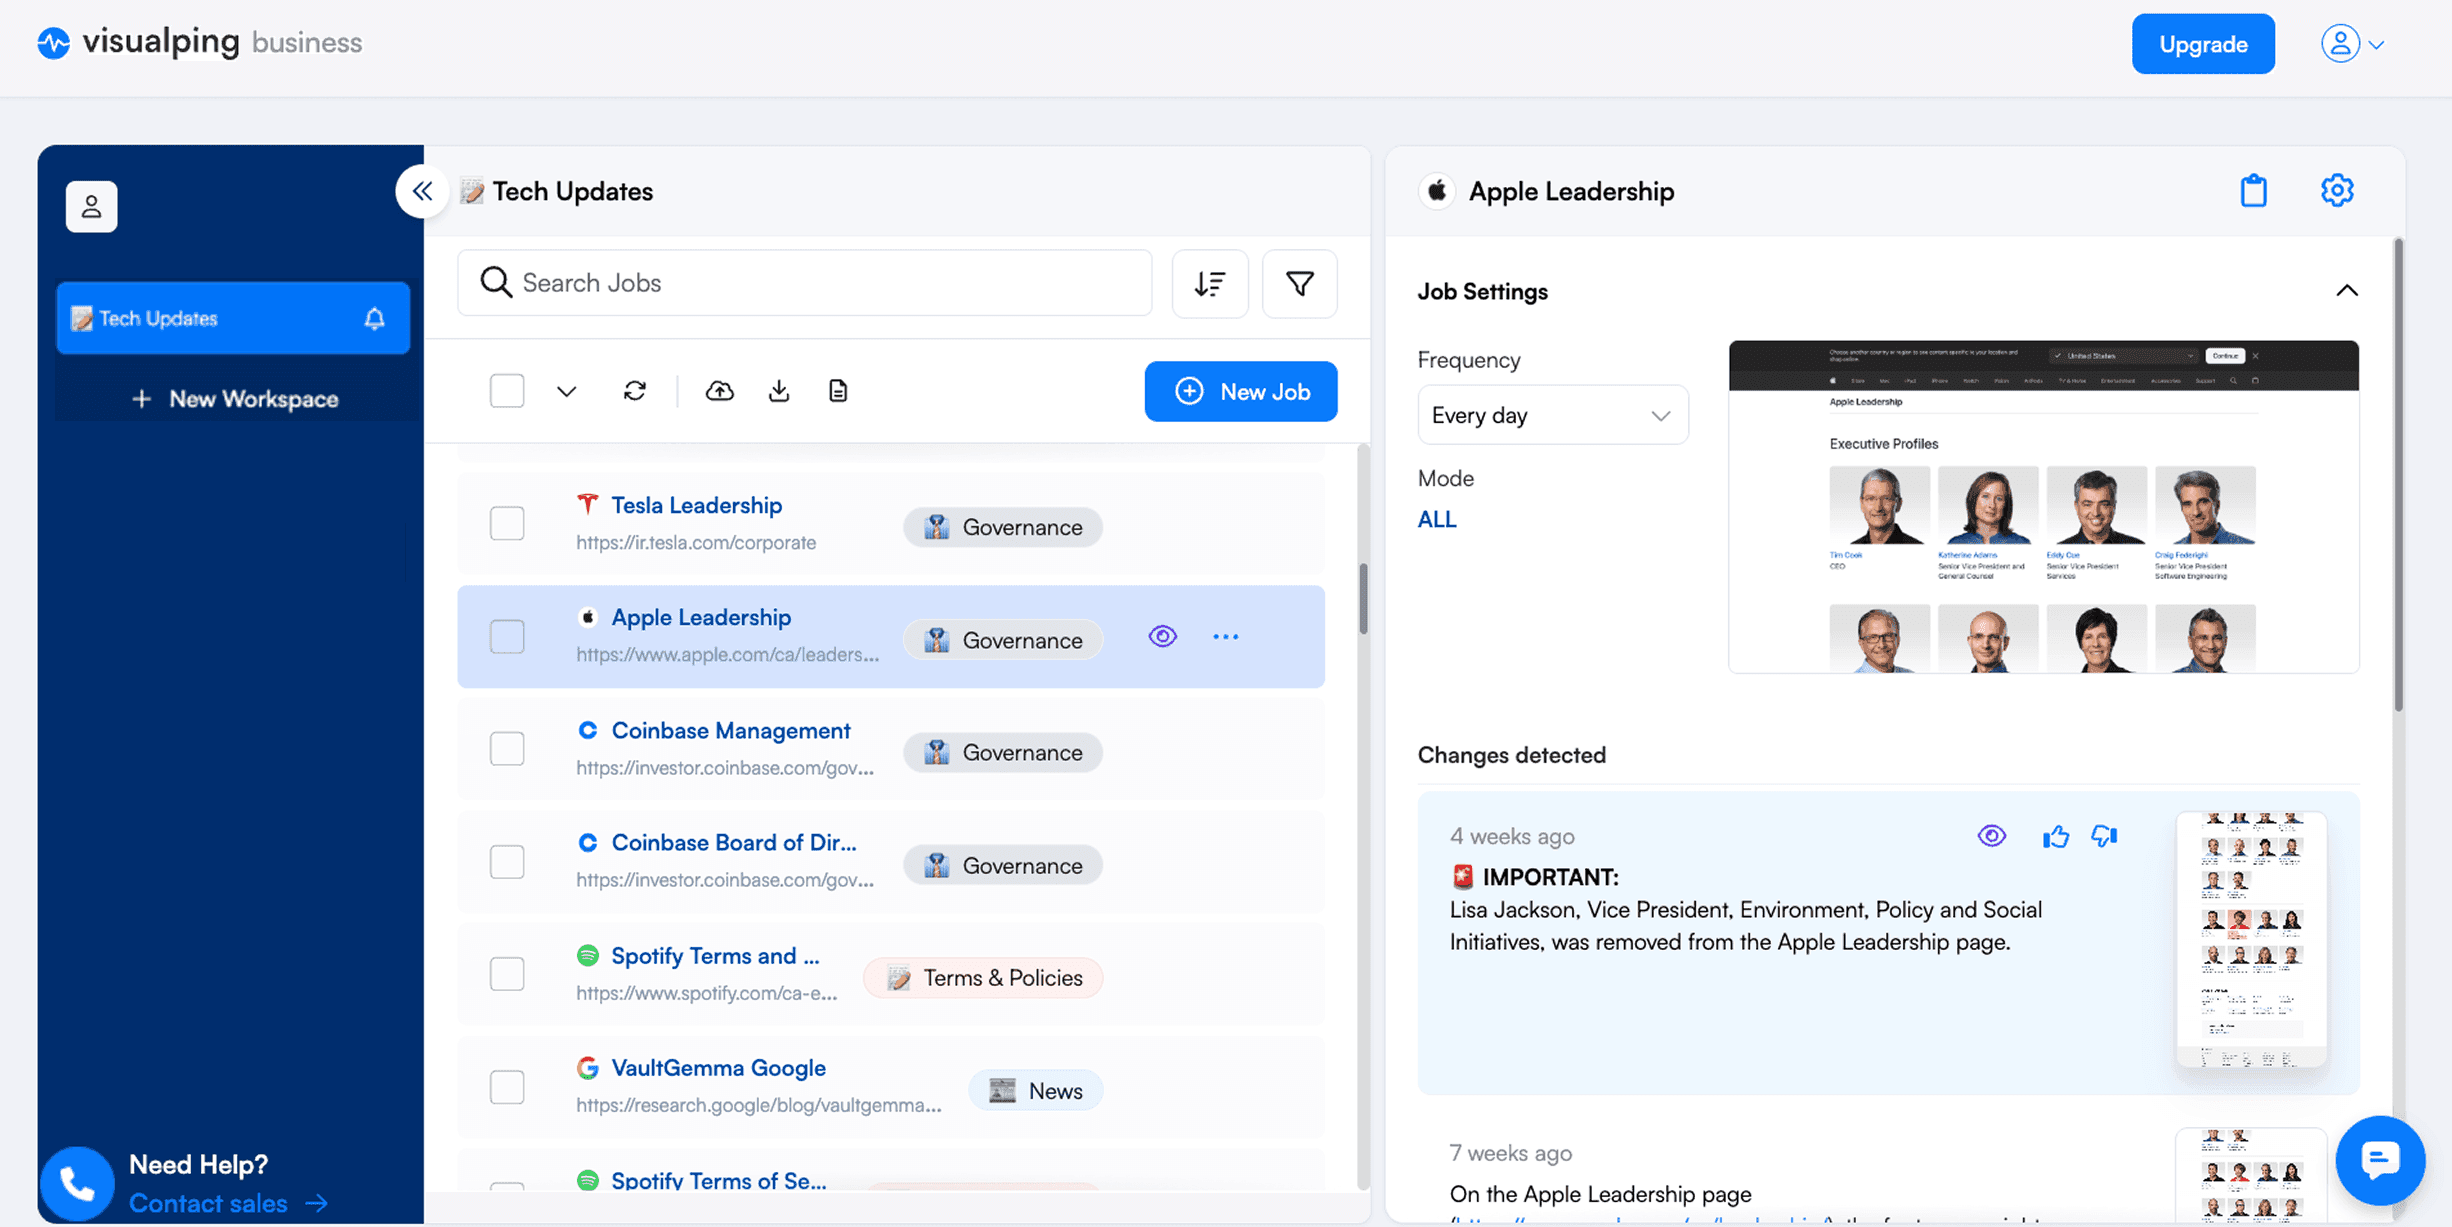
If you click into a specific job, you can see all the recent changes Visualping detected with timestamps.
The Visualping Alert Email
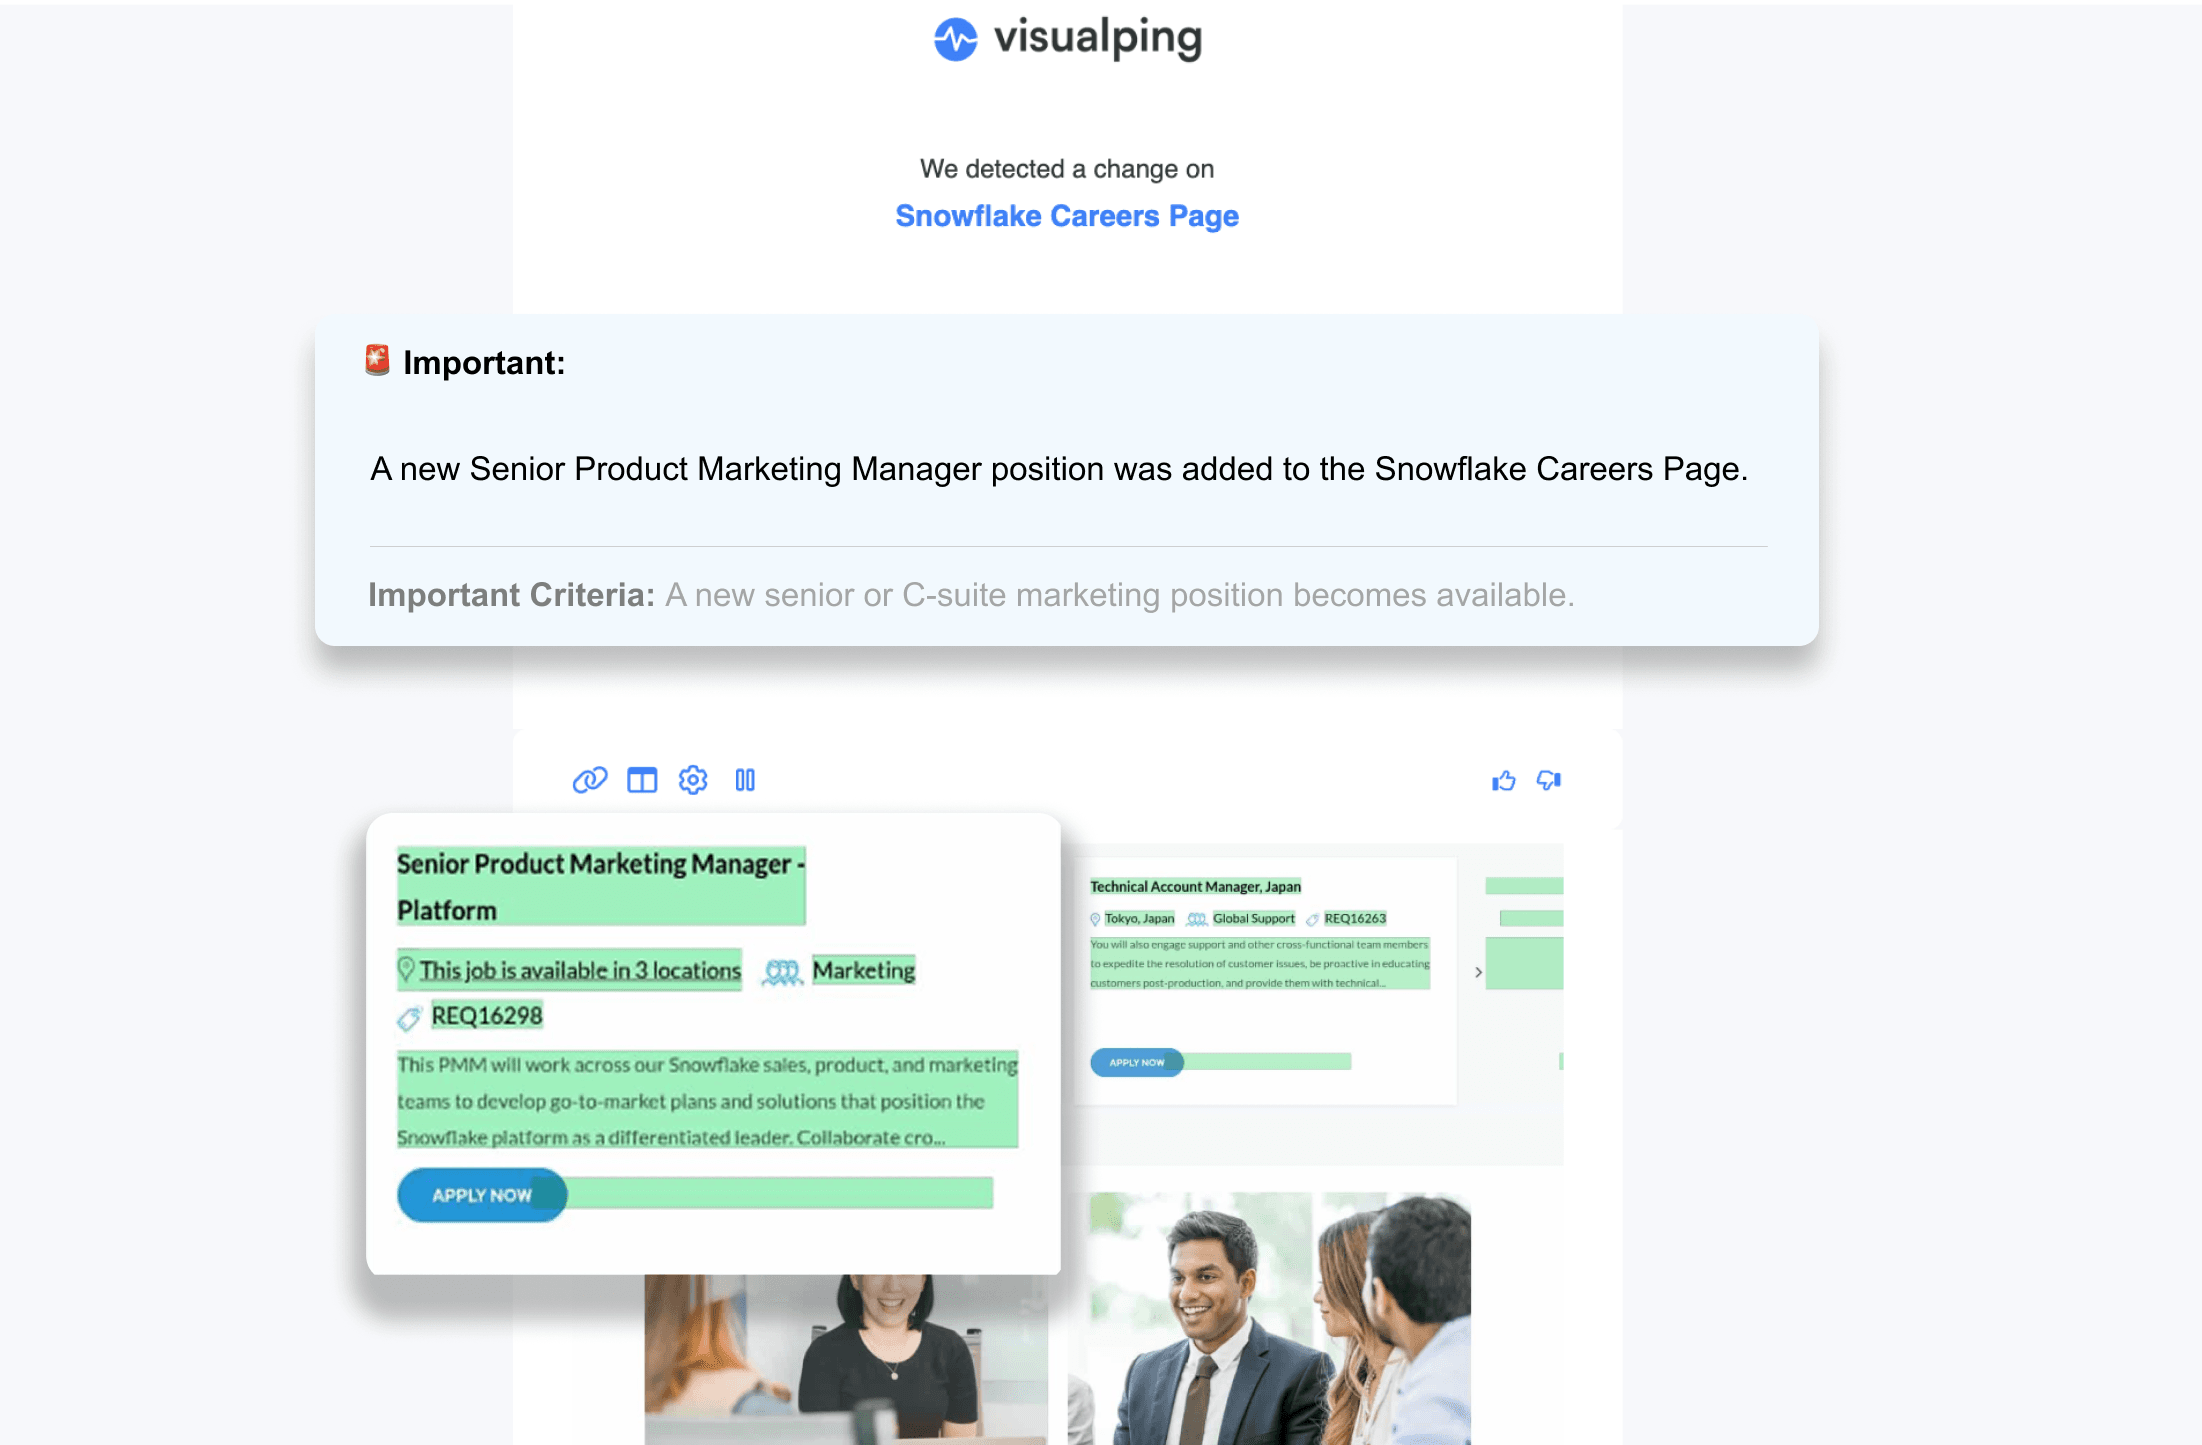
Once Visualping detects a change that meets your alert criteria, we'll send you an email right away. The alert email will contain:
- An AI summary of what exactly change
- Before and after screenshots with changes highlighted (green for additions, red for deletions)
- Links to: open the page, view changes in the Visualping dashboard, change the job settings, and pause the alert
Here's an illustrative example of an alert email for a job posting alert.
Actions and Advanced Settings for Website Monitoring
For those who want to track some more complex pages, there are several "Advanced" settings you can try out. These are great if the page you want to track changes on a website requires a bit of interaction.
For example, you can tell Visualping to perform actions on a page when it runs the check. Here are a few examples of actions you can tell Visualping to do:
- Click: Click on a button on the page (e.g next page button, clicking on a field in a form to type something)
- Type: Type something on the page (e.g entering a search term or log in info)
- Block: Blocks an element from appearing in a page, useful for preventing dynamic sections of the page such as ads, videos or sliders from loading and creating false alerts.
- Wait: Give slow-loading pages a few extra seconds to load fully.
Other advanced settings include using a proxy from a different country for your job, or disabling Javascript. If you have specific questions about our advanced job setting options, please refer to our Knowledge Base for the most up-to-date information.
Visualping for Business
If you’re running a business or are looking to monitor larger amounts of pages, check out our Enterprise plans. These plans include higher-frequency checks, advanced AI models, tailored reports, and custom support options.
Common Questions About Monitoring Webpages
How often can I track website changes? You can check as often as every two minutes on some of our premium paid plans or as infrequently as once a month. It depends on how quickly you need to know of updates to that page, and what kind of Visualping plan you're on.
Can I monitor a page that requires a login? Yes, using the "Actions" feature, you can use actions like "Click" and "Type" to enter your log-in credentials for a website before Visualping checks the page.
Is there a way to prevent false alerts? Absolutely. Use the "Block" feature to remove moving elements like carousels or ads, or set a specific AI criteria in the "Alert me when" box so you're only getting notified of changes that meet your criteria.
Please refer to our Knowledge Base for even more detail on different Visualping settings.
Want to track the changes that matter to you?
Sign up with Visualping to get alerted of important updates from anywhere online.
The Visualping Team
The Visualping Team is the content and product marketing group behind Visualping, a website change monitoring platform used by over 2 million users and 85% of Fortune 500 companies. Our team combines expertise in competitive intelligence, digital marketing, and web monitoring to help businesses stay informed about the changes that matter most.